
iOS Firebase Authentication
iOS 프로젝트에 Firebase Authentication 추가하기
FirebaseUI를 이용해서 빠르고 쉽게 로그인 기능을 만들어 보겠습니다.
시작하기전에 Firebase 기능을 사용하려면 Firebase에 프로젝트를 추가해야만 합니다.
프로젝트 추가하는 방법이 궁금하다면 iOS Firebase 셋팅 글을 참고해주세요.
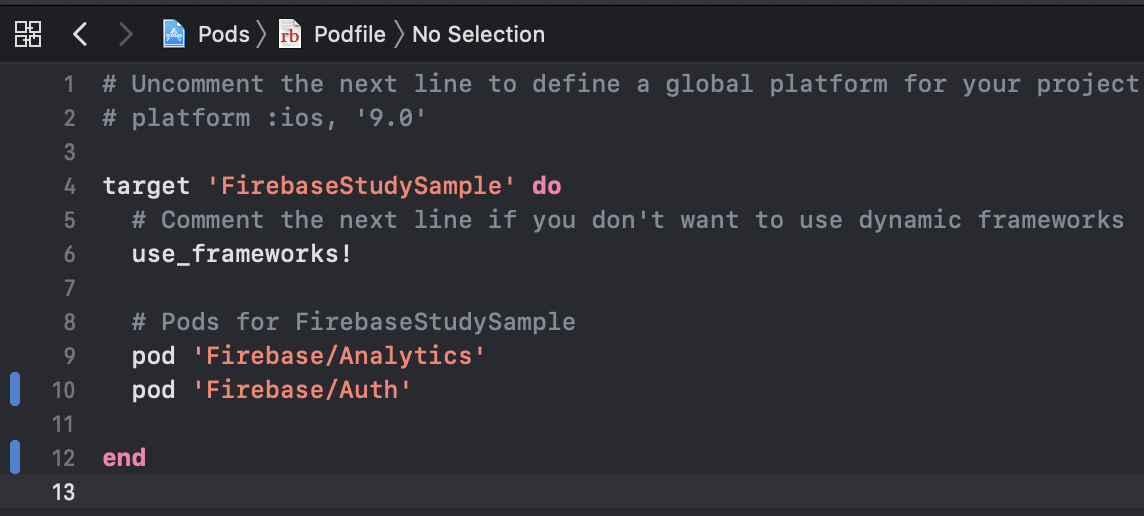
1. Podfile에 Firebase Auth 추가하기
iOS Firebase 셋팅이 끝났다면
pod 'Firebase/Analytics'
가 추가되어 있을 거에요.
그러면 그 아래에다가
pod 'FirebaseAuth'
를 추가해주시면 됩니다.
pod install명령어를 터미널에서 실행하고 기다려줍니다.
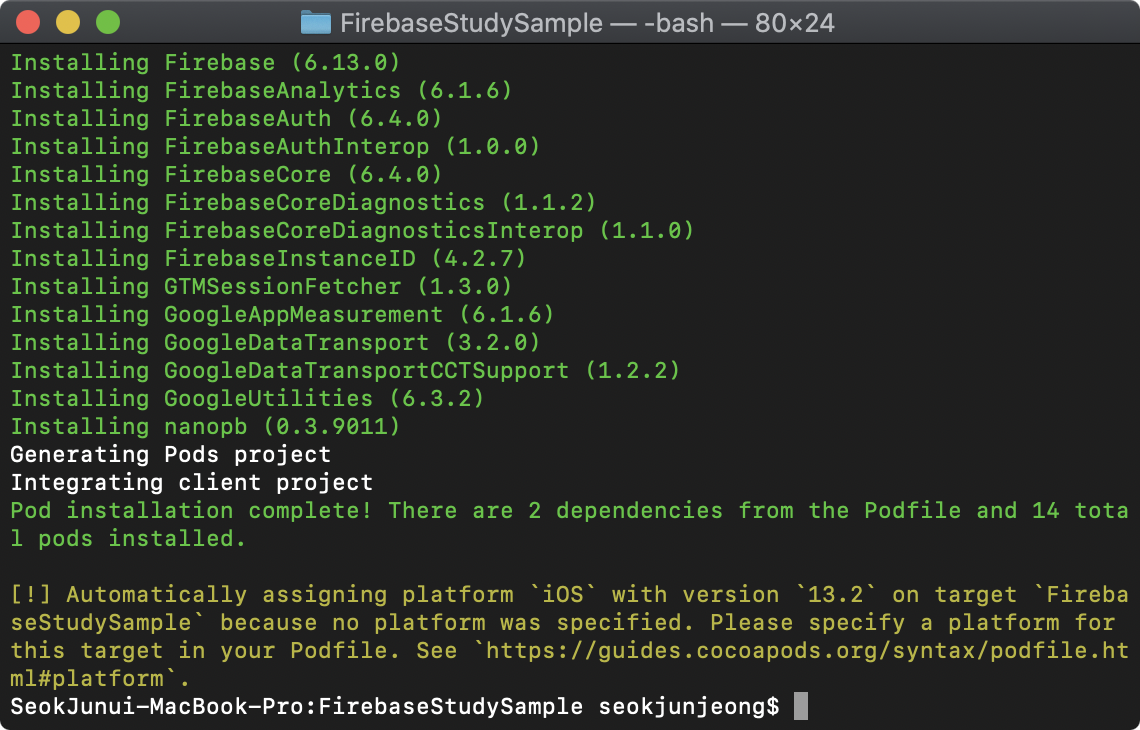
pod install 성공!
2. Authentication 활성화 하기
Firebase를 이용해서 로그인 기능을 만드려면 우선 콘솔에서 어떤 로그인을 활성화 해줄 것인지 정해야 합니다.
-
Authentication선택
-
로그인 방법선택
-
지원할 방식선택
3. SwiftUI에 layout 추가하기
import SwiftUI
import FirebaseAuth

struct ContentView: View {

    @State var email: String = ""
    @State var password: String = ""

    var body: some View {
        VStack(alignment: .center) {
            Text("Firebase Authentication")
                .padding(.bottom)
            HStack {
                Text("Email")
                    .frame(width: 100.0, alignment: .trailing)
                TextField("email@sample.com", text: $email)
            }
            .frame(width: 300.0)
            HStack {
                Text("Password")
                    .multilineTextAlignment(.leading)
                    .frame(width: 100.0, alignment: .trailing)
                SecureField("********", text: $password)
            }
            .frame(width: 300.0)
            Button(action: {
                Auth.auth()
                    .createUser(withEmail: self.email, password: self.password) { (result, error) in

                }
            }) {
                Text("Sign up")
            }
        }
    }

}
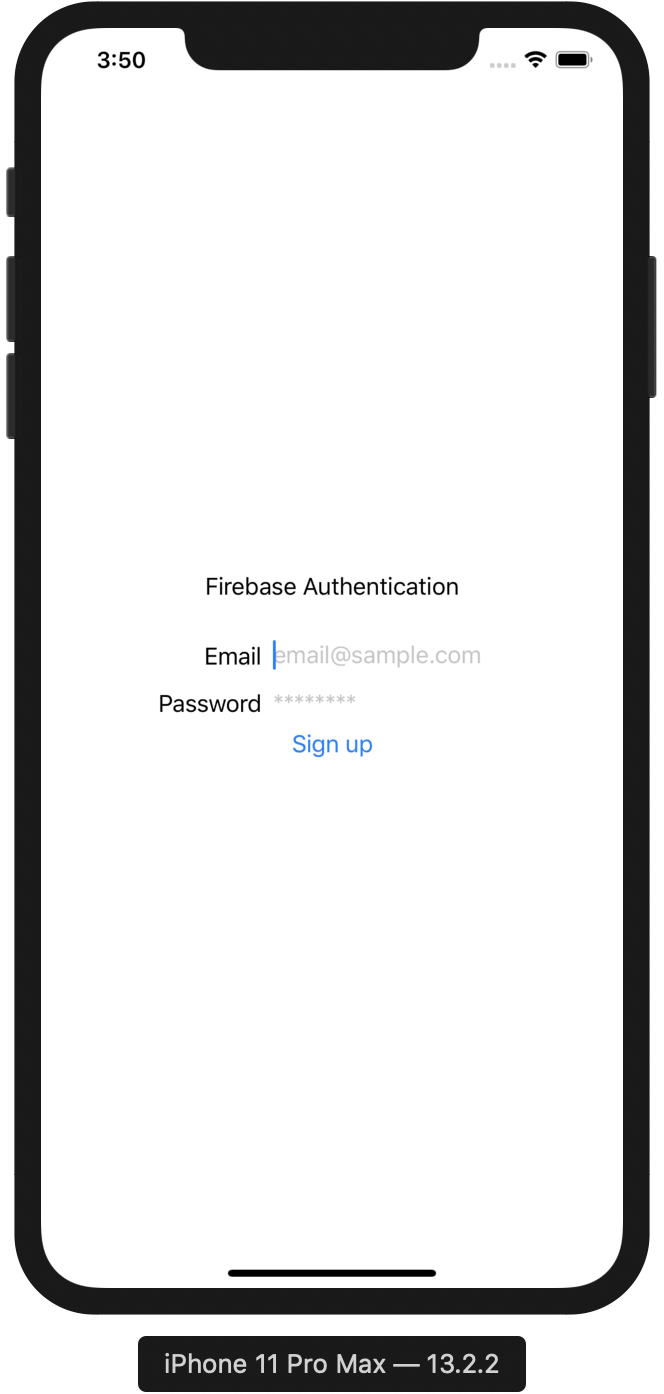
코드를 작성하면 실제 화면은 이렇게 나옵니다.
Email과 Password를 입력하고 Sign up 버튼을 누르면
Auth.auth()
    .createUser(withEmail: self.email, password: self.password) { (result, error) in

}
코드를 실행 시켜서 Sign up을 진행합니다.
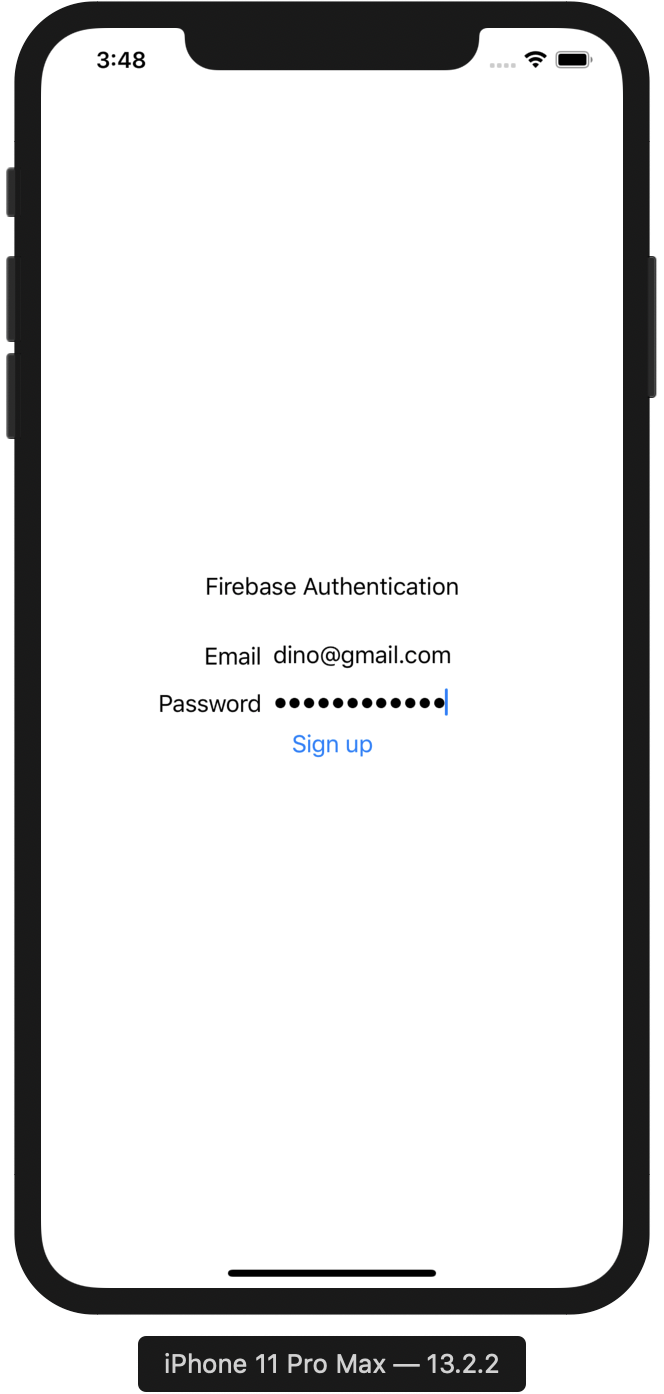
이렇게 입력을 하고 Sign up 버튼을 누르면
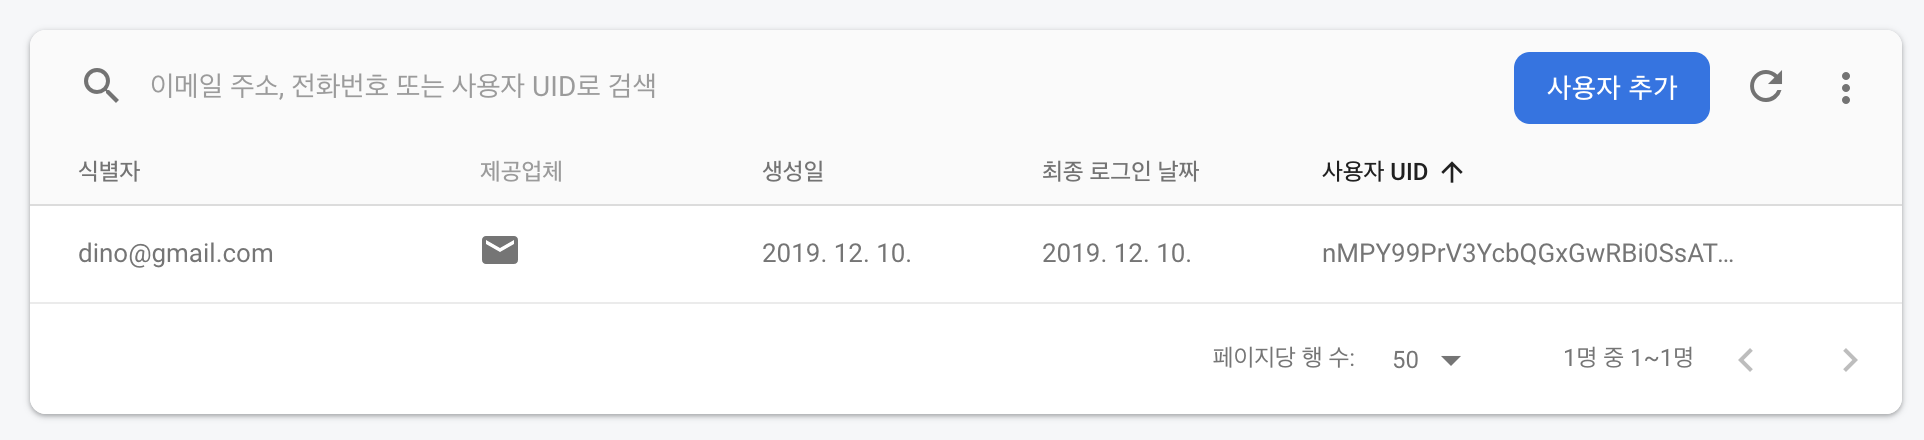
정상적으로 추가 된 것을 확인 할 수 있습니다.